
How to Draw Five Nights At Freddy'S
117,372
- staff_illustrator14
- August 2, 2015 (Added)
- 4 (Comments)
Here's another drawing tutorial from the popular video game Five Nights at Freddy's, follow the simple steps and learn how to draw it in minutes.
Category:
 Show Less

Step 1 - Start with a pencil, draw a rounded rectangle for his head and a trapezoid shape for his body, notice that his body is just a little bit wider than his head.

Step 2 - Draw a circle for his shoulder and a rectangle for his upper arm.

Step 3 - Add an oval shape just below his upper arm and a bigger rounded shape for his hand.

Step 4 - Draw another circle for his other shoulder and add two lines for his arm.

Step 5 - Sketch two half circles on the sides of his head and connect them with two short lines.

Step 6 - Add his hat by drawing a short rounded shape and a taller one above it.

Step 7 - In the center of his face draw a horizontal oval shape, add two half circles on top for the eyes and add a small nose in the middle.

Step 8 - Add his eyebrows and another two half circles inside his ears.

Step 9 - Keep drawing his mouth by adding two curved lines on the sides and a trapezoid shape under, draw 8 vertical lines inside.

Step 10 - Add his bow tie, draw a circle and two rounded rectangles on the sides, add a vertical line from his nose until the bow tie.

Step 11 - Add more details for his shoulders, draw three fingers and a circle line that start from his ears.

Step 12 - Draw a microphone in his hand and trace your guidelines with a black marker.

Step 13 - For the coloring part you can follow the shadings I used, especially in his hat bow tie and microphone.
Suggestions

How to Draw Springtrap from Five Nights At Freddy'S 3
by staff_illustrator14
199,685 views
199,685 views


How to Draw Toy Chica from Five Nights At Freddys
by staff_illustrator14
63,363 views
63,363 views


How to Draw Amanita Nightshade from Monster High
by staff_illustrator14
26,394 views
26,394 views
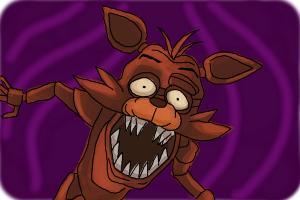
How to Draw Foxy from Five Nights At Freddy'S
by staff_illustrator14
85,781 views
85,781 views

██████▀░░░░░░░░░░░░░░░▀███
█████│░░░░░░░░░░░░░░░░│███
████└┐░░░░░░░░░░░░░░░┌┘░██
███░░└┐░░░░░░░░░░░░░░┌┘░░█
███░┌┘▄▄▄▄▄░░░░░▄▄▄▄▄└┐░░█
██▌░▄██████▄░░░▄██████▄░▐█
███─┘░░▓▓▓▓░░░░░▓▓▓▓░░└─██
██▀▓▓▓░▓▓▓▓░░░░░▓▓▓▓░▓▓░▀█
██▄▓▓▓░▓▓▓▓▄▄▄▄▄▓▓▓▓░▓▓▄██
████▄─┘█████████████└─▄███
█████░░▐██████...